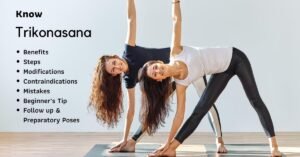
Triangle Pose ( Utthita Trikonasana ) is a beginner-friendly pose and has occupied its space in almost every different style of Yoga.
You cannot escape this posture as you will discover it in your very first Yoga Classes and it will remain with you in your long Yoga Journey.
Also, this pose targets to open up your Hamstrings, Hips, Groin, Chest, and further, it is perfect for warm-up too!
Trikonasana Benefits

By performing it properly and consistently, there are many benefits of Triangle Pose:-
1. It stretches your legs and your muscles around your knee, ankle joints, hips, groin muscles, hamstrings, calves, shoulders, chest, and spine.
2. Increases strength in your legs, knees, ankles, abdominals, back, and obliques
4. Supports in relieving back pain and signs of menopause
5. Activates the functioning of your abdominal organs
6. Lastly, Improves digestion, relieves constipation and helps in weight loss
Trikonasana Steps
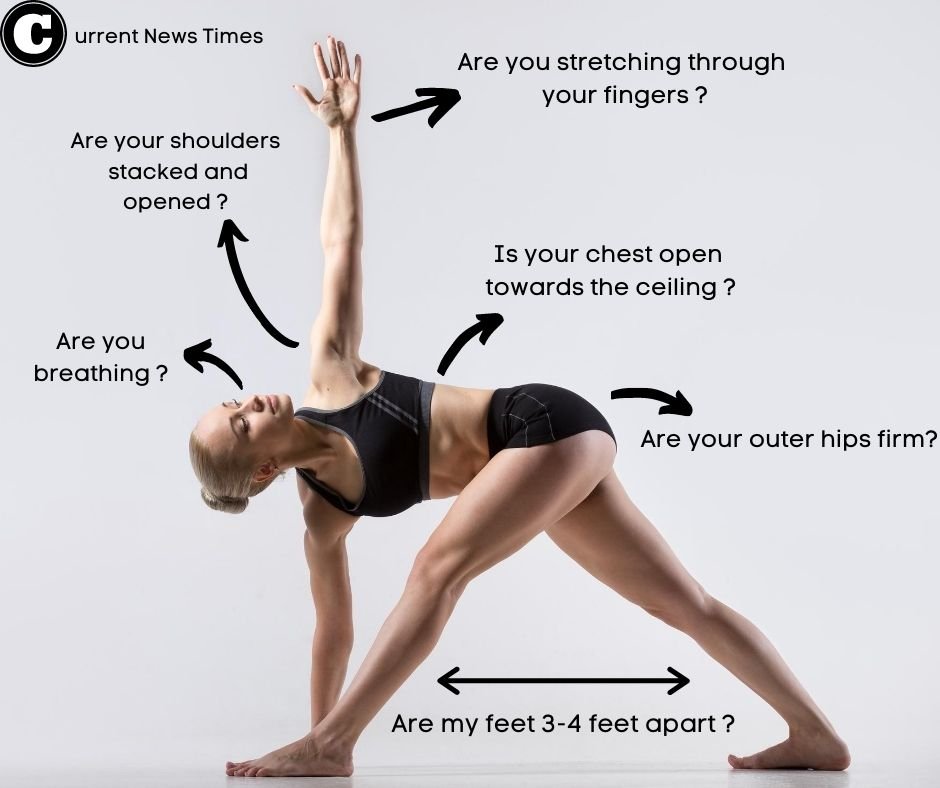
1. By standing, separate your feet 3 to 4 feet apart with parallel to each other, in order to bend on the right side and vice versa.
2. Turn your right foot towards the right side and extend your arms sideways, at the shoulder level, parallel to the floor.
3. Reach out on the right side with your right arm as if someone is pulling you in that direction, but you are resisting and keep your feet firmly grounded.
4. Now bend from the waist and, place your right palm on the right leg to an extent where it comfortable reaches. You can even hold the right big toe if you can reach there without making your knees bend. Keep your legs straight and the upper body to the side without leaning forward.
5. Bring your other arm in line with your shoulder and with your fingers facing towards the ceiling.
6. Keep pressing through your left heel, to keep the hip in its socket.
7. Stay in this asana for a few breaths and then come up with an inhale and follow the same steps on the other side.
Now, let us see the common mistakes we need to avoid !
Beginner’s Tip
If you feel unstable while performing this pose, then support your back heel or the back of your torso against a wall.
Common Mistakes
Firstly, try not to bend your right knee in order to touch the floor with your right hand because keeping your right leg straight is more necessary while performing this pose. However, to resist the temptation of bending your knee, you can place a block under your hand.
Secondly, avoid placing your hand on your knee because it creates a lot of pressure on your joints.
Lastly, remember that your right heel should be in a straight line with the arch of your left foot.
Modifications and Variations
As you will meet this pose frequently in your Long Yoga Journey, that’s why you need to practice it consistently and should not leave it, if you find it difficult in your first attempt.
So to make things easier, let us modify this pose to make it a little comfortable for you!
First, it is okay for you to bring your hand a little higher up your leg, but remember to not place it directly on your knee and as an alternative option you can put a yoga block for your lower hand to feel comfortable.
Second, you can drop your left arm over the left ear to make it parallel to the floor while keeping your shoulder embedded into its socket
Third, you can take hold of your inner right thigh with your left arm by putting it through your back, as a result, it opens up your chest a little bit more towards the sky
Lastly, to enhance your balance and to increase the engagement of your core, use the weight out of your right arm by hovering it above the floor.
Contraindications of the Trikonasana
Do not perform this asana if you are suffering from
- Migraine
- Diarrhea
- Low or High Blood Pressure
- Neck, Back, Hip and Shoulder Injuries
If you are are suffering from High Blood Pressure, then try not to raise your hand while performing this pose as it will further raise your blood pressure or otherwise consult your doctor.
Preparatory Asanas to do before Trikonasana
- Katichakrasana
- Konasana
- Vrikshasana
Follow up asanas to do after Trikonasana
- Veerbhadrasana
1. By standing, separate your feet 3 to 4 feet apart with parallel to each other, in order to bend on the right side and vice versa.
2. Turn your right foot towards the right side and extend your arms sideways, at the shoulder level, parallel to the floor.
3. Reach out on the right side with your right arm as if someone is pulling you in that direction, but you are resisting and keep your feet firmly grounded.
See more
By performing it properly and consistently, there are various benefits of Triangle Pose:-
1. It stretches your legs and your muscles around your knee, ankle joints, hips, groin muscles, hamstrings, calves, shoulders, chest, and spine.
2. Increases strength in your legs, knees, ankles, abdominal, back, and obliques
3. Relieves Stress
4. Supports in relieving back pain and signs of menopause
- 13 Effective Yoga Poses for Flexibility by Expert’s
 Yoga makes us ” healthy and fit “, this phrase comes to your mind when someone talks about this oldest discipline and it is, therefore, true because over 300 million people around the globe practice Yoga to feel good. And the importance of Yoga in … Read more
 - 16 Experts on How to relieve Stress in 2025 ?Here are the list 16 health experts giving you their best advice on how to relieve stress quickly! See this now for their free & trust-able advice.
- Pratyahara: How to Practice it On & Off the Mat?
 Pratyahara might as well be called the forgotten limb of yoga. Although, you might be practicing it more often than you’d think! ” Pratyahara means withdrawal of the senses, and you are practicing it throughout your whole yoga routine. “ Let’s take a closer look … Read more
 - How to do Triangle Pose ( Trikonasana ) Correctly ?Triangle Pose ( Utthita Trikonasana ) is a beginner-friendly pose and has occupied its space in almost every different style of Yoga. You cannot escape this posture as you will discover it in your very first Yoga Classes and it will remain with you in … Read more
- 7 Life-Changing Expert’s Yoga stories to get yourself really Inspired
 Why you started your Yoga Journey? Well, if I guess, you have started your Journey because of flexibility, over 69% of practitioners claims that ( You might have seen some beautiful Yogini doing splits or some complex Asanas on Instagram, which should have raised the … Read more