
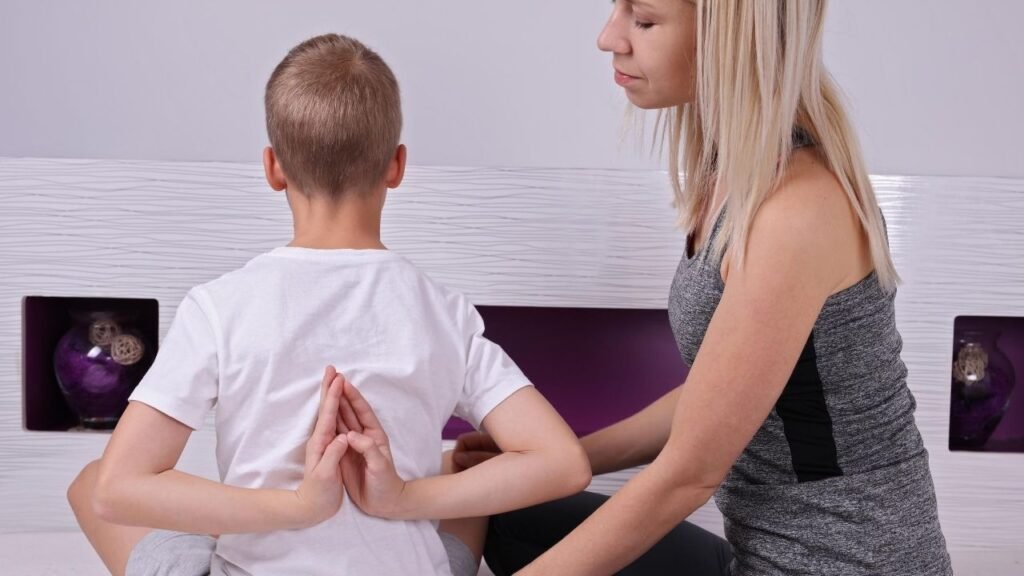
Yoga makes us ” healthy and fit “, this phrase comes to your mind when someone talks about this oldest discipline and it is, therefore, true because over 300 million people around the globe practice Yoga to feel good.
And the importance of Yoga in our life can be explained through the saying in Shweta Swatar Upanishad–
न तस्य रोगो न जरा न मृत्युः प्राप्तस्य योगाग्निमयं शरीरम्॥
The meaning of the above line is that ” The person who makes Yoga a part of his life will get rid of diseases and old age ” and it is true!
And the reasons to make Yoga part of your life are limitless!
So, no excuses please, just kidding 🙂
Therefore, in this article, I will give you a great reason to perform Yoga and that is ” Flexibility ”
Why flexibility? Here are the three big reasons:-

1. The more flexible you are, the less likely you are to get hurt:
You put on your headphones and you go on a walk or lifted some heavyweight, but you have limited range of motions and that’s why you an increased risk of injuries, but with more flexibility, a joint can move through a wide range of motion before incurring injury and it also takes some pressure off of your tendons.
So, when you have really tight, shortened muscles, extra pressure is exerted on your tendons, which ultimately causes pain.
To summarize: Tight muscles can equal strain and pain. That’s why flexibility is important.

2. It goes hand-in-hand with mobility:
Mobility and Flexibility are two different things ( “Mobility is the ability of a joint to reach its full range, opposed to flexibility, which refers to the ability of a muscle to stretch.” ),
But they work very closely, for example, to consider, you’ve got tight hamstrings from a lack of flexibility, you won’t be able to take your hip joint through its full range of motion, which is a lack of mobility.
Therefore, flexibility is what allows your muscles to stretch while mobility is what allows them to move freely within your joints, and the more flexible you are the more mobile you will be, too.
3. It can give you better posture:
Flexibility can help you to recover from the damages caused by your ” boring desk life “.
Increased “straddle flexibility“—aka flexibility in your hip abductors and hip flexors—lengthens the muscles that have tightened over time due to long-term sitting and in addition, it also assists your spine mobility and core development.
As a result? With Flexibility, better posture is all around!
The Best Yoga Poses for Flexibility by Expert’s
Now, we have got the reasons, let’s jump up to the Yoga Practices to increase our flexibility and in this article, you will be focused to resolve the three major hubs of stiffness in your body, that is, hips, shoulders, and hamstrings as these three areas tend to get even tighter from sitting for long periods of exertion.
And the wonderful part, these Yoga Practices are suggested and written by our Certified Yoga Expert’s Dr. Charu Sharma and Sonnia Talwar, who are well experienced and have gained profound expertise in the field of yoga over the years.
Thus, you can follow these practices with the confidence of gaining desired flexibility goals.
Yoga for Flexibility: Padangusthasana (Big Toe Pose)
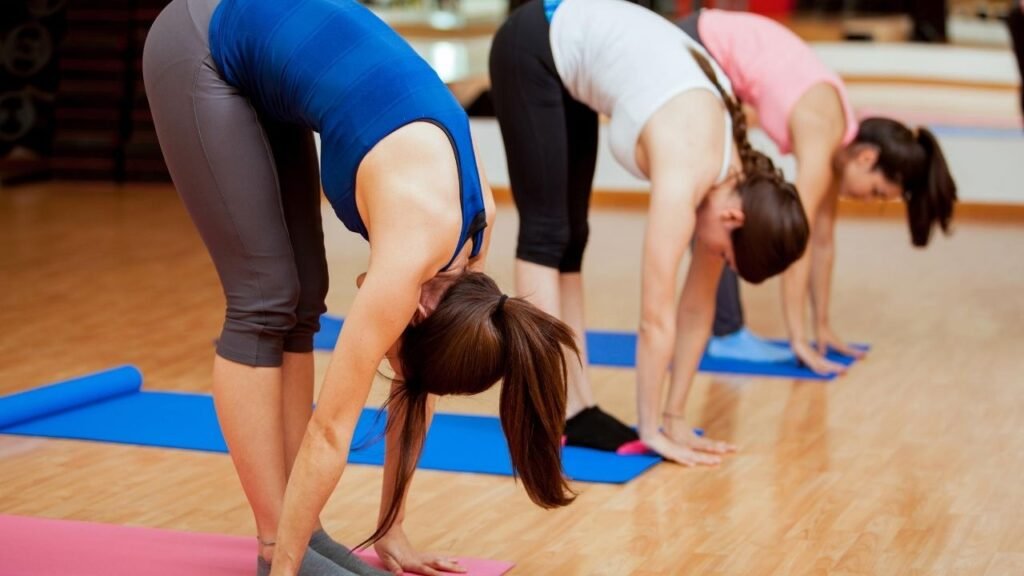
This pose gently lengthens and strengthens even stubbornly tight hamstrings.
Big Toe Pose: Step-by-Step Instructions
1. To begin, stand straight with your hands on your side and feet apart with a minimum gap of 6 inches
2. Inhale, stretch your arms above your head and while exhaling, slowly bend your torso towards your feet
3. Now, try to touch your feet and hold your toes with your fingers
4. Stay in this position for 60 seconds
5. While breathing in, lift your upper body and make sure that your elbows are not bent and your legs are straight
6. Bend again as you exhale and repeat the above steps daily for 7-8 times
Padangusthasana (Big Toe Pose) benefits
1. It stretches your hamstrings, knees, legs, arms and provides relief from muscle pain
2. Padangusthasana releases excessive gas and burns fat from the abdominal area
3. Boosts metabolism and helps in the management of high blood pressure, insomnia, and headache
4. It revamps the functioning of your liver and spleen and helps overcome eating disorders
5. This asana increases blood flow and enhances concentration
6. It also improves flexibility and strengthens all the muscles in your body
Yoga for Flexibility : Bound Angle Pose ( Baddha Konasana )
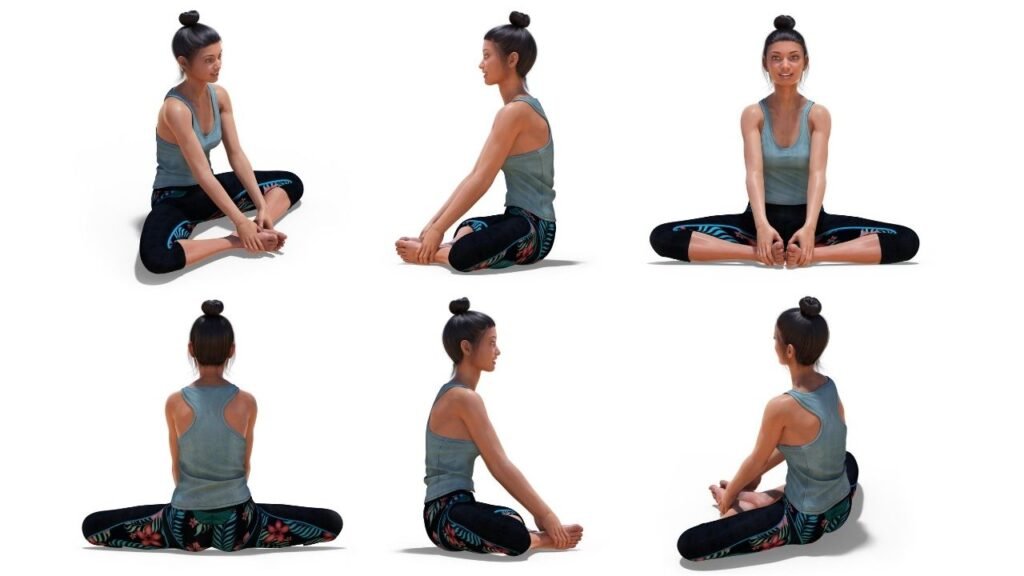
One of the best hip openers around, Bound Angle Pose counteracts chair- and cardio-crunched hips.
Bound Angle Pose: Step-by-Step Instructions
1. Sit straight with your legs stretched out in front of you
2. Exhale, bring your feet towards your pelvis in such a way that the soles of your feet touch each other and your knees are on your sides. (Just like in the Butterly Pose – Titli asana)
3.Try to push your knees to the ground as much as you can
4.If your knees do not touch the ground in the beginning, do not worry. Have patience. It will take time and some practice
5. Now, hold your toes with your fingers
6. Bend your body from the above of your buttocks and try to lean forward as much as you can
7. Try to touch your head or shoulders to the floor and this may not happen in the beginning but will take some time with consistent practice
8. Do the above steps for at least 30-60 seconds
Benefits of Baddha Konasana (Bound Angle Pose)
Baddha Konasana has various benefits such as :
1. Stretches your knees, groin and hips, lower back and inner thighs
2. It relieves menstrual pain and discomfort
3. Persistence practice of this asana in late pregnancy eases childbirth
Yoga for Flexibility: Downward-Facing Dog
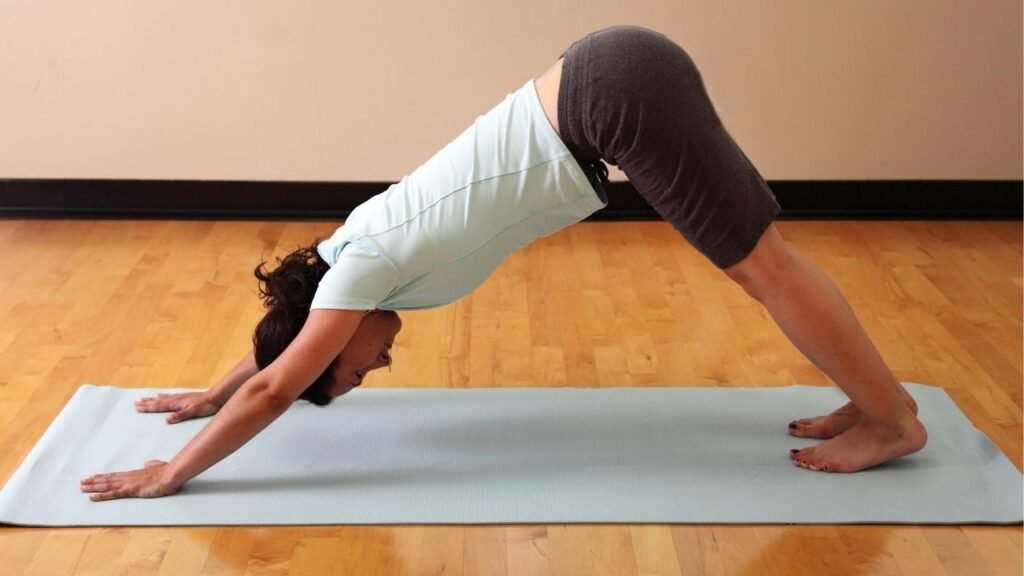
One of yoga’s most widely recognized yoga poses, Adho Mukha Svanasana, offers the ultimate all-over, rejuvenating stretch.
Downward Facing Dog: Step-by-Step Instructions
1. Come onto your fours. Form a table such that your back forms the tabletop and your hands and feet form the legs of the table.
2. As you breathe out, lift your hips, straightening the knees and elbows, form an inverted V-shape with the body.
3. Hands are shoulder-width apart, feet are hip-width apart and parallel to each other. Toes point straight ahead.
4. Press your hands into the ground. Widen through the shoulder blades and Keep the neck lengthened by touching the ears to the inner arms.
5. Hold the downward dog pose and take long deep breaths and look towards the navel.
6. Exhale and bend the knees, return to table pose to Relax.
Doward Facing Dog Benefits
1. Doward Facing Dog stretches the hamstrings and calves and strengthens the arms, legs, and back.
2. It can help relieve back pain.
3. Strengthens the whole body – upper body, arms, shoulders, abdomen, and legs.
Extended Triangle Pose (Utthita Trikonasana)
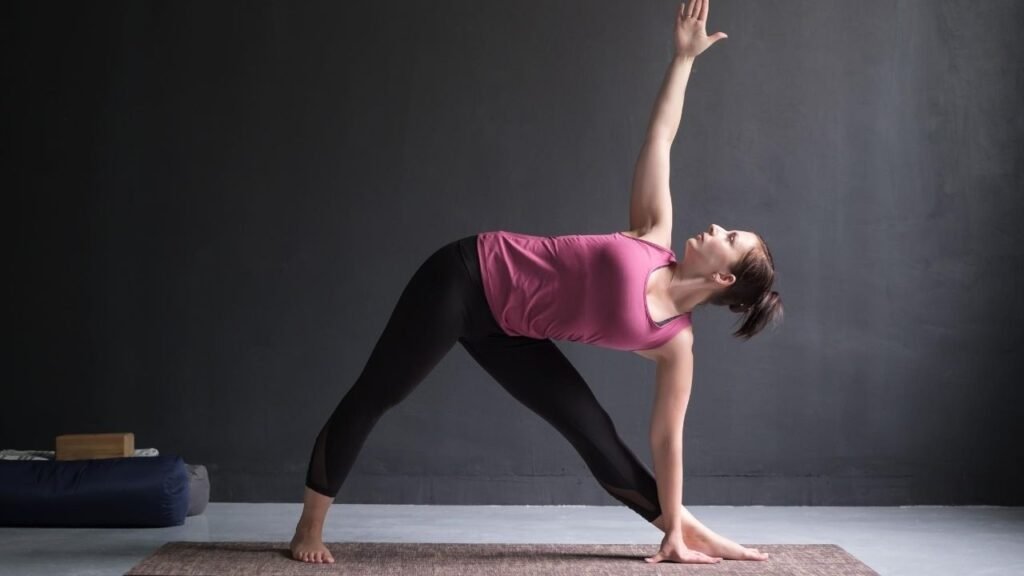
Extended Triangle Pose: Step-by-Step Instructions
1. Stand straight. Separate your feet comfortably wide apart (about 31/2 to 4 feet).
2. Turn your right foot out 90 degrees and left foot in by 15 degrees.
3. Ensure that your feet are pressing the ground and the weight of your body is equally balanced on both the feet.
4. Inhale deeply and as you exhale, bend your body to the right, downward from the hips, keeping the waist straight, allowing your left hand to come up in the air while your right hand comes down towards the floor.
5. Keep both arms in a straight line.
6. Rest your right hand on your shin, ankle, or the floor outside your right foot, whatever is possible without distorting the sides of the waist.
7. Stretch your left arm toward the ceiling, in line with the tops of your shoulders. Keep your head in a neutral position or turn it to the left, eyes gazing softly at the left palm.
8. Ascertain that your body is bent sideways and not backward or forward. Pelvis and chest are wide open.
9. Stretch maximum and be steady. Keep taking in long deep breaths. With each exhalation, relax the body more and more. Just be with the body and the breath.
10. As you inhale, come up, bring your arms down to your sides, and straighten your feet.
Repeat the same on the other side.
Extended Triangle Pose: Benefits
1. Stretches and strengthens the thighs, knees, and ankles
2. Stretches the hips, groins, hamstrings, and calves; shoulders, chest, and spine
Garland Pose (Malasana)
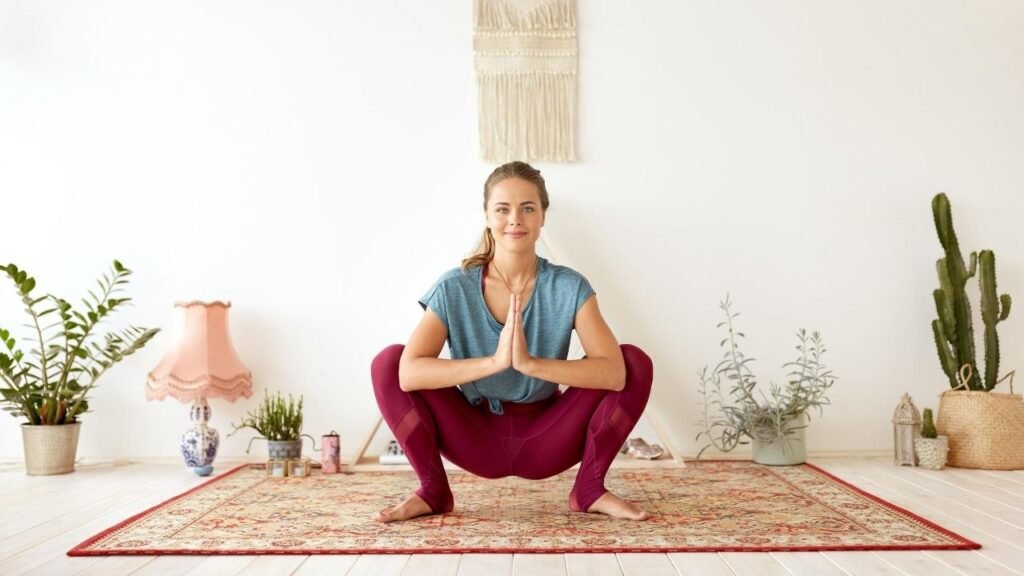
The garland pose stretches the ankles, groins, and back. If your heels don’t reach the floor, rest them on a folded blanket.
Garland Pose: Step-by-Step Instructions
1. Come to stand with your feet about mat’s width apart.
2. Bend the knees and lower your butt toward the floor to come into a squat.
3. It’s natural for your toes to want to turn out and that’s OK, but don’t overdo it. Eventually, you’re working toward keeping the feet closer to parallel.
4. Take your upper arms inside your knees and bend the elbows to bring the palms together into Anjali mudra (prayer position).
5. Try to bring your hands to your heart center with the forearms parallel to the floor, allowing the pressure of your elbows to open the knees slightly.
6. Keep your spine straight, your butt moving toward the floor, and your shoulders relaxed away from your ears.
7. Stay here for five breaths, then straighten the legs to come out.
Garland Pose: Benefits
1. Garland Pose opens the hips and groins as it stretches and strengthens the feet and ankles.
2. While squatting comes naturally to children and is used as a resting position in many places on Earth, but most adults in the First World have gotten out of the habit. So far out of the habit that they find squatting extremely uncomfortable for their hips and feet.
3. Garland pose is an effective way to counter the tightness you get from spending too much time sitting in chairs.
Yoga for Flexibility : Padahastasana
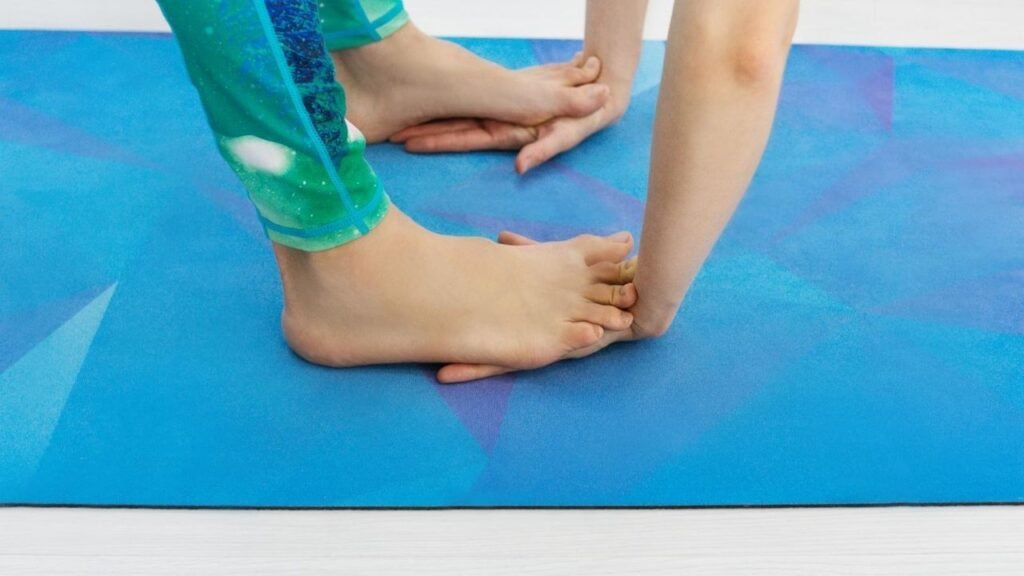
Meaning of Pada – Foot, Hasta – Hand & Asana – pose.
It is an advanced pose that improves the flexibility of hamstrings. This asana stretches your entire backside: from the soles of your feet, the back of your legs, and in addition it gives a good message to the spine also.
Steps:-
1. Inhale and raise your hand & body upwards.
2. Now while exhaling bend forward, tuck your head in, towards your knees.
3. If needed then bend your knees in starting days and then slowly-slowly you will build up flexibility to straighten your legs.
Precaution:-
It builds pressure on the stomach and stretches hip & thigh muscles, therefore a person suffering from back pain, hip injury, ulcer should take precautions.
People who have heart problems should perform this asana under the supervision of Trained Yoga Experts.
Janu Sirsasana
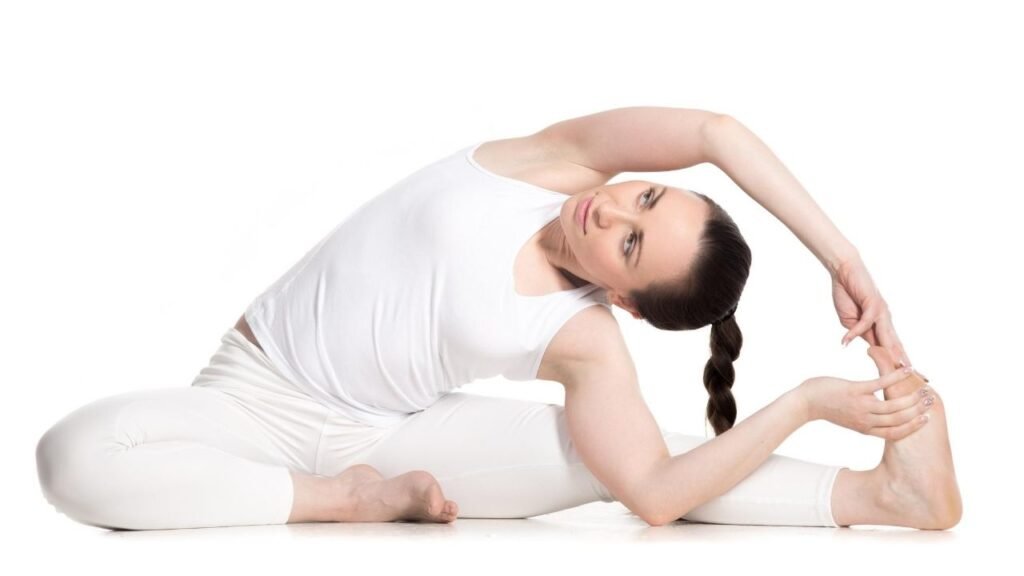
Janu = knee, Sirsa = head & Asana-Pose.
Suitable for all levels, this pose helps to improve flexibility in Hamstrings, hips, groin muscles. It also increases blood flow in the lower abdomen and can be a great stress reliever.
Steps:-
1. Sit on the floor with straight legs in front of you.
2. Bend your right knee, bring the heel back toward your perineum.
3. Inhale and bring your hand above your head to stretch your above body.
4. Rotate your upper body slightly towards the right leg.
5. Now, with an exhale bend forward and hold your feet. Repeat the same with the other leg.
Precaution:
It stretches Hip & thigh muscles therefore person suffering from sciatica, hip injury, knee injury should take the precaution.
People who have heart problems, recent operation cases & pregnant women should perform this asana under the supervision of Trained Yoga Experts.
If there is an injury at your shoulders or neck then this asana can be difficult to practice.
Marjariasana
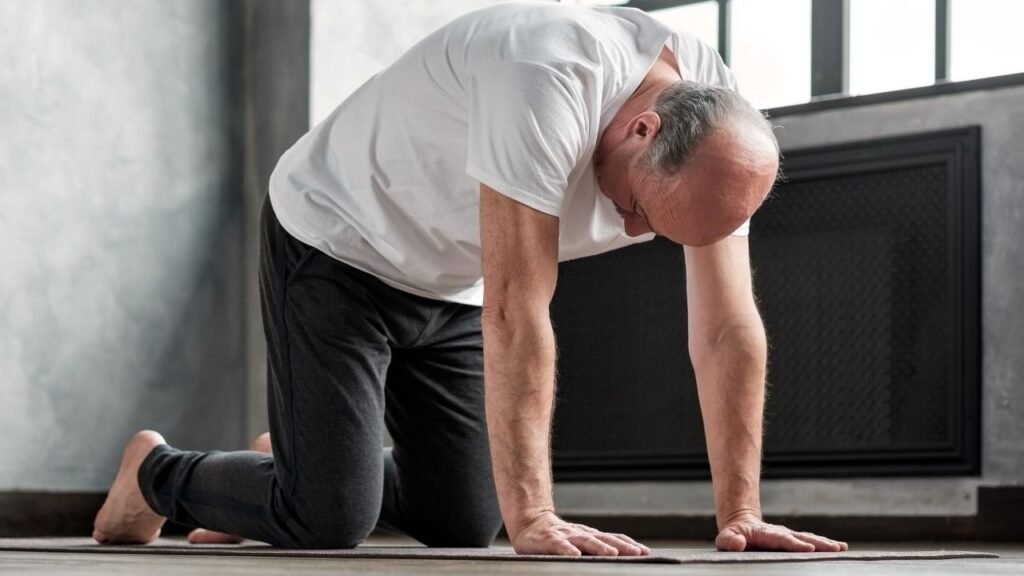
Marjari = Cat, Asana = Posture or Pose.
This Back and forth movements helps to circulate spinal fluids. It well works for improving flexibility in the Neck, Back torso, and strengthen Wrist, Shoulders, Spine.
Steps:-
1. Kneel on the ground, there should be a gap between your knees and the feet.
2. Now bend forward and keep your both hands flat in front of your knees.
3. Your hands should be below the shoulders.
4. Now exhale with pulling your back upwards and your head should face your thighs.
5. With an Inhale raise your head and your back should be in a concave shape.
6. This is one cycle of Majarisana
Precaution:
Consult to a doctor and practice under the supervision of Yoga Expert, if you have back or neck injury.
Yoga for Flexibility : Bhunamana Asana

Bhu- ground, Naman- namaskar, Asana-Pose.
This is a forwarding bending asana. It stretches the hamstrings and calves’ muscles.
Steps:-
1. Sit on a yoga mat and open your legs in both direction as per your strength.
2. Now with an inhale raise your hand and then with an exhale to go down.
3. Hold your toes and then try to touch the ground with your chin.
Safety measure:
Persons who are suffering from hypertension, heart problem, cervical spondylitis should avoid the asana or consult to the doctor first.
Yoga for Flexibility : Gomukha Asana
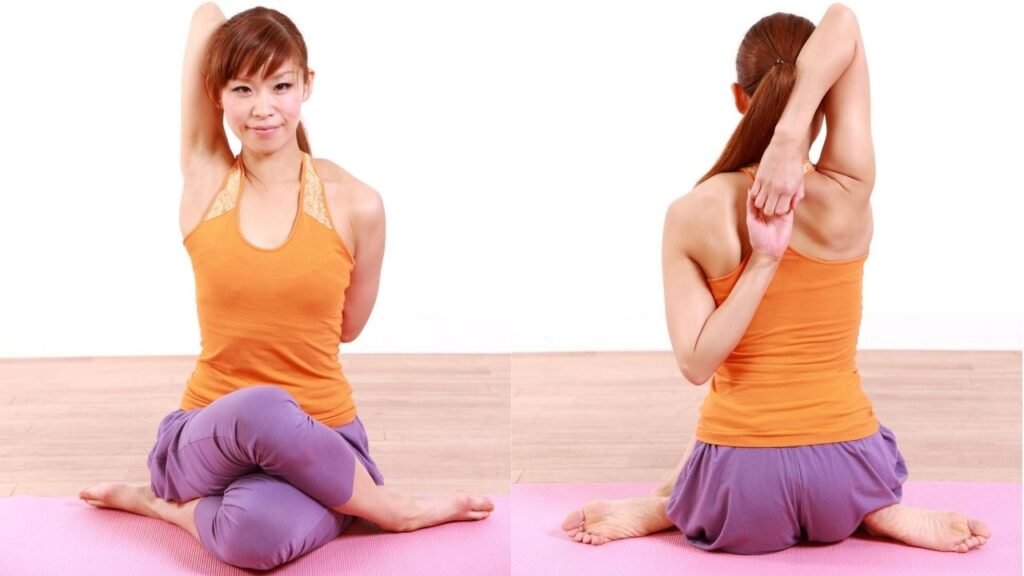
Gomukha means “face of Cow” in Sanskrit.
This asana stretches your shoulders, chest, and arms and it is appropriate for all levels of practitioner.
Steps:-
1. Sit in a crossed-leg position, right leg over left or vice-versa
2. Keep legs as wide as possible without bending the knees and keep the bottom of the left foot against the inner left thigh and do the same with the other.
3. With an Inhale through your nostrils, raise your right hand over your head (the side of your hand in which your leg is above the other, in a prior position) with bending your right elbow.
4. Clasp your both hands behind the back and while leaving the position, exhale slowly and release the pose.
Precaution:
In case of tight shoulders which results in the failure to clasp your hands, try to use a strap.
People suffering from cuff injuries or knee pains should avoid practicing this without consulting their respective doctor.
Yoga for Flexibility : Halasana
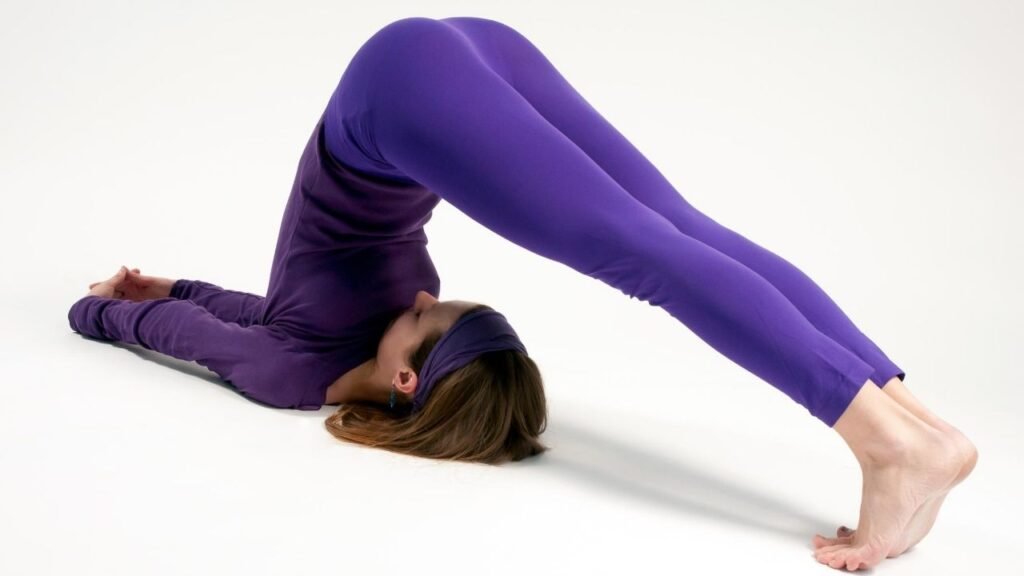
Hal – plow, and Asana- pose.
Halasana works on the flexibility of your backbone and helps to strengthen it too. This asana also helps to alleviate tension in your neck, shoulders, and spine.
Steps:-
1) Lie on your back keeping your legs together and arms by the side, palms facing downward.
2) Press the palms into the floor and inhale to lift the legs off the floor and in the same motion lift the buttocks also. Immediately, support your back as the buttocks lift from the floor.
3) Start exhaling and take your legs over your head. Try releasing the toes into the floor and sliding them away from the head. Lift the thighs away from the forehead and tailbone towards the ceiling.
4) Keep drawing your groin into your pelvis to create space there and releasing any building tension in the lower back and also pressing the shoulders into the floor and easing out any tension building in the upper back and neck.
5) The chin gets tucked into the chest and creates a chin lock. So, focus on the throat and keep it soft.
6) You can keep supporting the back or extend the arms straight ahead by keeping them long parallel to each other.
7) Breathe softly and deeply and hold this pose for 10 to 20 breathes or for 1 minute.
8) To release, sightly lift your feet off the floor and soften your knees and keep your arms long and parallel in front.
Start to press them down and use them as a break to help bring the buttocks and legs back.
Precautions:-
Halasana is contraindicated for the people suffering from a slipped disc, cervical spondylitis, lumbar spondylitis, sciatica, hernia, ulcer, high blood pressure, and heart problems.
The person who has weak hamstring muscles or have calf muscle issues, then they must try this practice under the supervision of a trained yoga expert.
Yoga for Flexibility: Ardha Matsyendra Asana
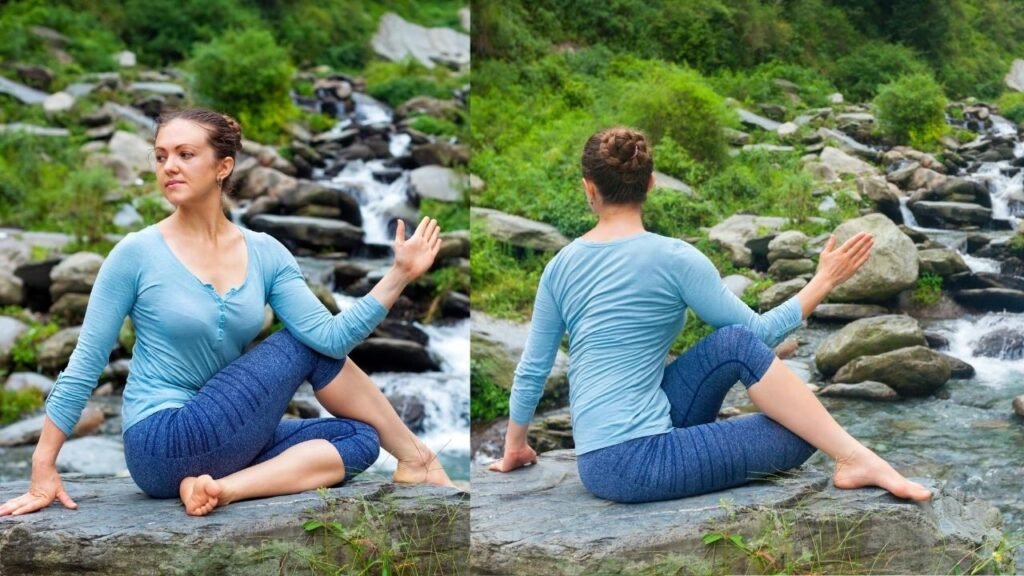
Ardha- Half, Matsyendra- Name of one the respect Yoga Guru, also mentioned in Hatha yoga Pradipika.
Steps:-
1) Sit on the floor with legs straight in front and bend your right knee and place the foot flat outside the left thigh. So, the right knee faces the ceiling and then slide your left foot under the right leg to place it outside the right outer hip
2) Place your right palm at the back and as close as you can towards the center of the spine.
With an inhale, take the left arm towards the ceiling reaching up with the fingers and keeping the arm close to your ear. Try to create length in the spine, grounding through the sit bones, and using the right palm for support and make sure your left hip does not lift.
3) Exhale, bring the left arm down and place it outside the right knee or thigh. Now, by pressing your thigh towards your chest and keeping the right foot and both buttocks firmly grounded, begin to revolve your spine and start to look back over your right shoulder.
4) Keep creating lengths in the torso to turn back further with every breath and make sure you are twisting the entire spine. Think of turning your navel, chest, and shoulders back by distributing the twist evenly in the entire spine.
5) Hold for 5 to 7 breathes. Release with an exhalation and repeat the same steps on the other side.
Precaution
People who have recent surgery cases for abdominal, heart, brain, hernia, peptic ulcer, or slip disc should avoid this pose.
Yoga for Flexibility: Matsyasana
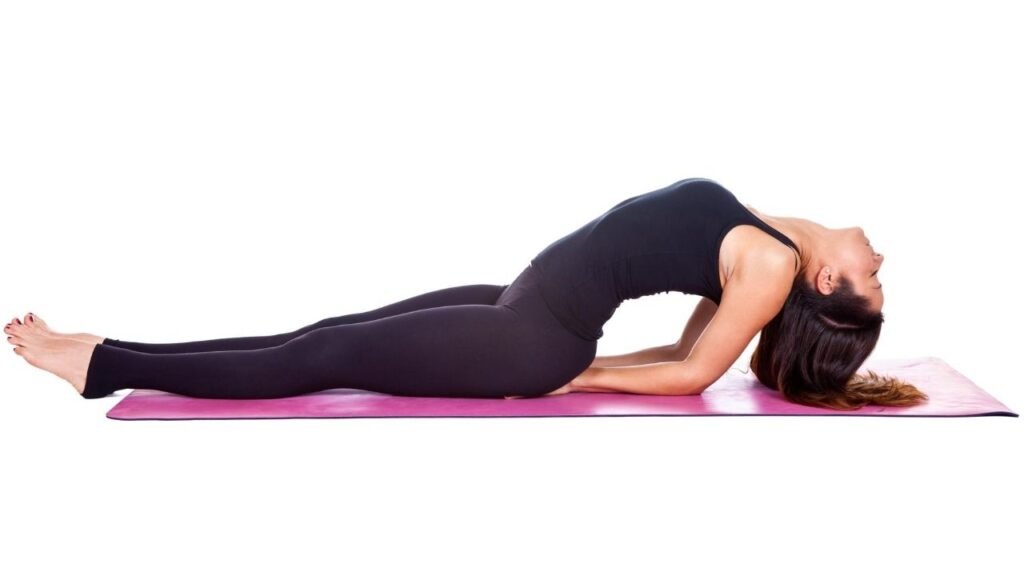
Matsya- Fish, Asana- Pose.
Matsyasana stretches the upper body focusing especially on the neck muscles and it also works as a counter-pose to Halasana.
Steps:
1. Lie down on your back.
2. Keep your hands above your head near the shoulders, fingers towards an upward direction.
3. Slide your body toward the back with puffing up your chest and after getting to the position, keep your hands parallel to your body.
4. Come back slowly with the help of your hands.
Precautions:
You should avoid this asana if you are suffering from neck or back injury. Try to avoid the practice during headache.
Sukshma Vyayam
Sukshma Vyayam is a set of exercises that works for entire body muscles.
It should be practice before yoga asanas, as it helps to release stiffness in joints and makes the body flexible, strong, and ready for further practices and it can be performed separately.
Pranayama
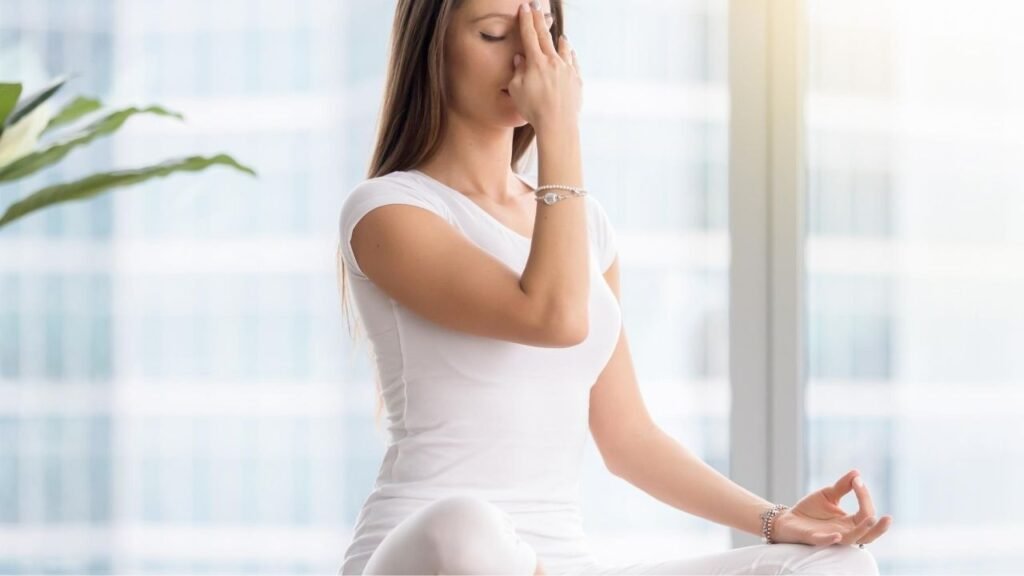
Regular practice of breathing techniques make us feel light and keeps the capacity of the lungs more nourished, flexible, and free of toxins.
Although Pranayama or breathing practices do not have a direct relation with physical flexibility, but, it will help to maintain our inner peace, calmness and as we know that there is a direct relation between our mind and body.
So, if our mind is relaxed in adjusting position, then it will help our body to manage on a physical level too. For this purpose, Anuloma Viloma pranayama & Bhramari Pranayama can be great choice.
Conclusion
It is a well-known fact that yoga and flexibility go hand in hand.
The practice of yoga makes our body more flexible which gives our muscles and joints a greater range of motion with less fear of injuries.
Lastly, What are your flexibility goals and Do you like this article of our experts ?
Tell us in the comment box, below !
About the Experts
Dr. Charu Sharma

Dr. Charu Sharma is a highly experienced Yoga Teacher, served as an expert in various renowned Indian Institutions like Moraji Desai National Institute of Yoga, Laxmibai National University of Physical Education, etc.
She is currently working as a Yoga Expert in Indian Yoga Association, PrCB, New Delhi and has completed her PhD in Yogic Sciences and is a certified Yoga Teacher by the Ayush Ministry of India.
Sonnia Talwar
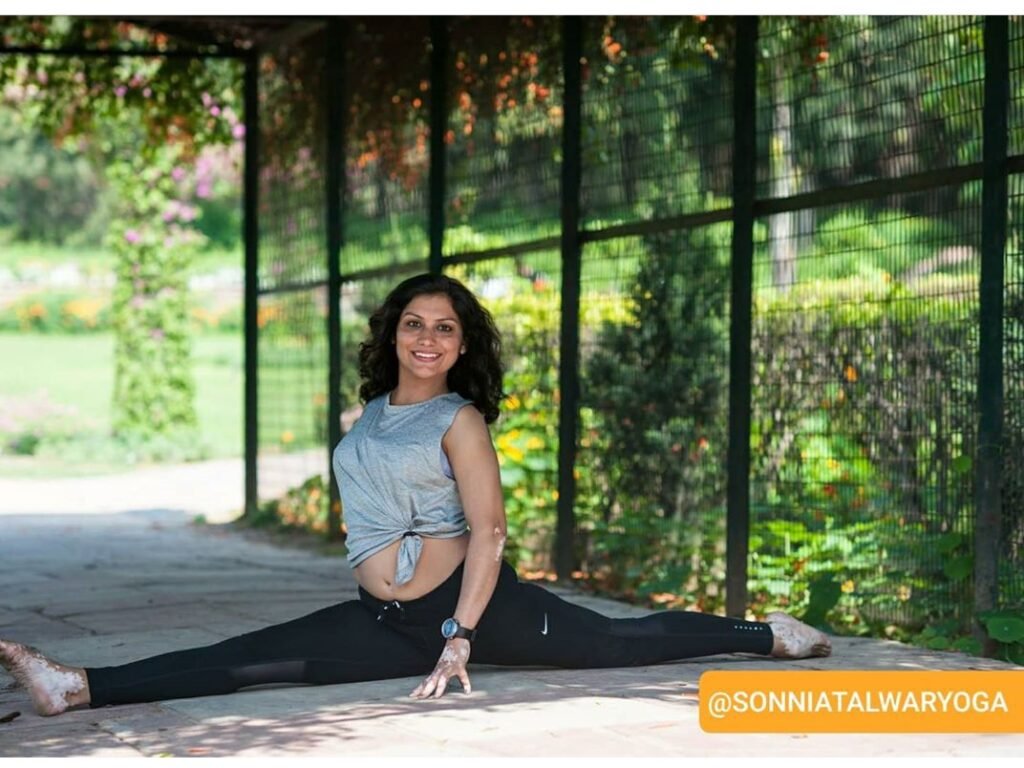
Sonnia Talwar is an certified fitness trainer and hosts various online Yoga Classes, Private Sessions and Teachers Training Programs.
Frequently Asked Questions
Definitely, yoga can enhance your flexibility, improves your wide range of motions, and helps you feel leaner and longer. With all the poses, twists, and bends, yoga is certainly a form of discipline that can stretch you out.
Here are our top 13 Yoga Poses for improving flexibility:
1. Big Toe Pose
2. Bound Angle Pose
3. Downward-Facing Dog
4. Extended Triangle Pose
5. Garland Pose
6. Padahastasana
7. Janu Sirsasana
8. Marjariasana
See more